


| Version 4 (modified by runom, 18 years ago) (diff) |
|---|
Creating a Planet for Orxonox
This tutorial will show you how to create a planet with procedurale textures for Orxonox.
1st Step
First we have to create an actual mesh for our planet. Most often people use UV-spheres for this purpose, however unsightly texture distortions occur, especially around the poles, because of the UV unwrap. Those distortions can be prevented by using a cube and moving the vertexes so that they lie on the surface of a sphere. That way there are only very minor distortions. Confused yet? Good. I'll show you now how to all that, step by step:
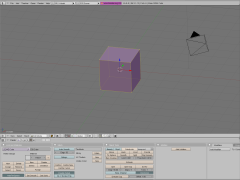
| First start Blender and select the pre-created cube and press TAB to enter edit mode and choose all vertexes/edges/faces. | 
|
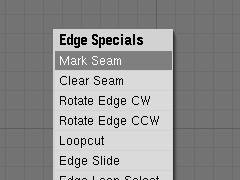
| Next press CTRL + E and from the pop-up choose the option Mark seam. | 
|
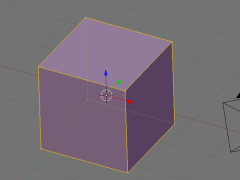
| You should end up with some like this: | 
|
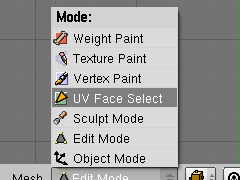
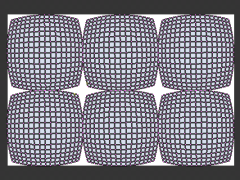
| Next, switch to UV Face Select mode, press U and select Unwrap. In order to spare you the time fiddling about with this, here's a blend file with all steps done until this point. | 
|
2nd Step
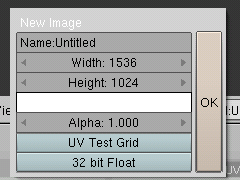
Now before we go any further with the model, we'll create the texture and bake it to an image. That way we can later change the model but keep the original UV coordinates and mapping.
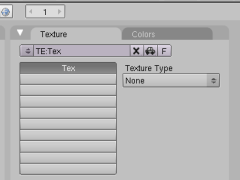
| Now onto the textures. Press F6 to get to the texture window. Add new adds a texture layer to your model. | test |
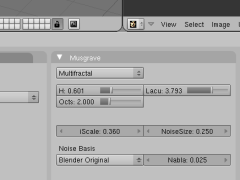
| There are a few procedurale texture algorithms available but most often Musgrave, Clouds and Noise work best. Here you are pretty much free to play around with the settings. | test |
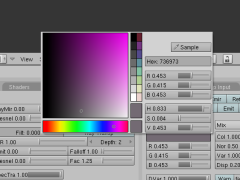
| After setting up your algorithms, you need to assing a colour to them. Go to Material buttons (red orb) and click on Texture. Click on the texture you want to alter and click on Map to. Here you can choose the colour which you want to be assigned to the algorithm - just click on the coloured field. Proceed doing this for all your textures. You may want to assign a different colour to the gray background texture too. | test |
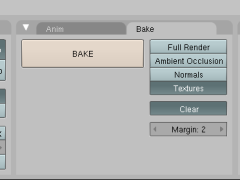
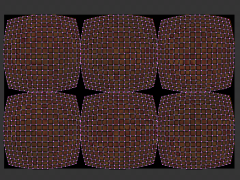
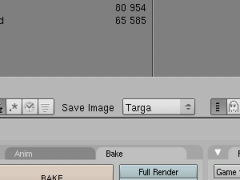
| In order to get our texture into the game, we need to "bake" it, i.e. render the texture to an image. To do this, press F10 and Bake. In the bake menu, click on Textures and BAKE to bake it. | test |
| You'll hopefully end up with something like this. | test |
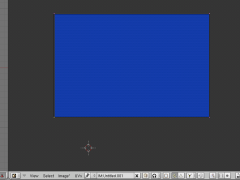
| Save the image in the UV editor, you'll need it for the game | test |
3rd Step
In the next step we'll increase the vertexcount of the cube and map it to a sphere.
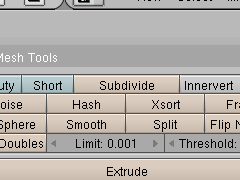
| Press F9 and TAB to get into edit mode. Click on Subdive in order to increase the vertex count, about 1538 vertexes should be enough | test |
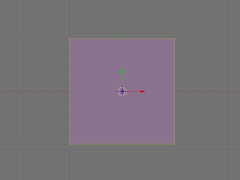
| Next make sure that your space cursor lies in the origin. If not, just press "SHIFT + C" to reset it. | test |
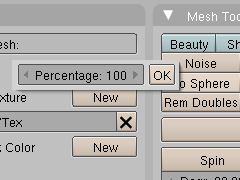
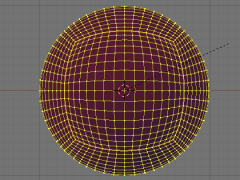
| Click on To Sphere, make sure it's on 100 and press ok. | test |
| Now we need to resize the sphere's radius to 1 so that the scaling in-game works properly. Make sure the whole sphere is selected and press S. Scale it to 1. | test |
4th Step
Exporting Meshes is explained properly in this wiki-article: https://www.orxonox.net/wiki/BlenderExport
Attachments (18)
- cube1.png (15.5 KB) - added by runom 18 years ago.
- markseam.png (2.3 KB) - added by runom 18 years ago.
- faceselect.png (6.3 KB) - added by runom 18 years ago.
- seamsselected.png (11.2 KB) - added by runom 18 years ago.
- texselect.png (7.7 KB) - added by runom 18 years ago.
- settings.png (12.3 KB) - added by runom 18 years ago.
- colourselect.png (18.4 KB) - added by runom 18 years ago.
- bake.png (8.6 KB) - added by runom 18 years ago.
- subdivide.png (5.1 KB) - added by runom 18 years ago.
- tosphere.png (6.6 KB) - added by runom 18 years ago.
- cursor.png (2.8 KB) - added by runom 18 years ago.
- resize.png (37.8 KB) - added by runom 18 years ago.
- newimagesett.png (7.5 KB) - added by runom 18 years ago.
- uveditnewimage.png (12.7 KB) - added by runom 18 years ago.
- unwrapped.2.png (73.4 KB) - added by runom 18 years ago.
- baked.png (78.7 KB) - added by runom 18 years ago.
- saveimage.png (12.3 KB) - added by runom 18 years ago.
- planetTemplate.blend (294.1 KB) - added by runom 18 years ago.
Download all attachments as: .zip