


| Version 1 (modified by FelixSchulthess, 18 years ago) (diff) |
|---|
Getting Started With Blender
In this tutorial you will learn the basics of working with the 3d-modeling program Blender within one hour. Using Blender can be very confusing, especially if you have never worked with 3d-modeling software before. But don't be discouraged, once you have learned the peculiar function of the mouse in Blender and remember the most important hotkeys, you will be able to create complex scenes and objects in no time. At the end of this tutorial you will have created a simple model of a house. One more thing before you start: if you are stuck, do not hesitate to ask for help. If no help is around, write an email, use Google or check the Blender manual online for quick reference.
The User Interface
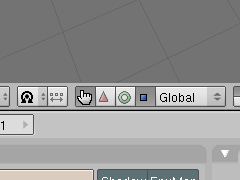
After starting Blender, you will see two large docked windows and the main menu bar at the top of the screen. The larger window is the 3D-View. Here you will see the models you create. Below there is the Buttons Window, where you can adjust properties, create different materials or render the scene. For now, some basics about using the two docked windows will be enough:
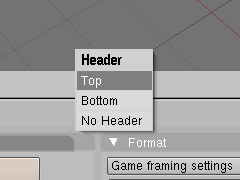
| Left-click the border between two windows to adjust the size of them. Every window has a header containing some content-related controls. By right-clicking into the header, you can select its position in a small menu. You can also hide the header, but this is not recommended for the beginner. | 
|
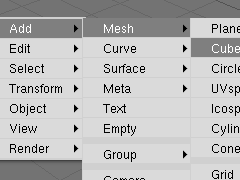
| With the small drop-down menu at the very left in a window's header, you can change the type of the window. Right now, you have 3D-View and a Buttons window; this is the combination you will use most of the time. Anyway, try to play with the view menus and adjust your windows the way you want them. You may also use more than one window of a kind. | 
|
| You can also split a window to create a new window or you can join two windows to reduce the number of windows. To do this, click the border of a window with the middle mouse button. In the appearing menu, you can select whether you want to Join or Split windows. | 
|
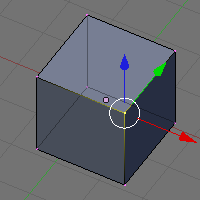
3D-View
We will now concentrate on the 3D-View, the large window showing your scene and your models. The Blender 3d-world has three cartesian coordinate axes: the x-axis (red), the y-axis (green) and the z-axis (blue). In the lower left corner of the 3D-View, you see the current orientation of the three axes. Using the number pad of your keyboard, you can adjust the view. Hit 2/4/6/8 to rotate the view in a predefined direction. Hitting 7 jumps to top view, 1 to side view and 3 is for the front view. 5 toggles between perspective view and orthonormal view. 0 on the number pad switches to camera view. Here, you will see three rectangles marking the cameras view. You will not be able to rotate in camera view, since our camera is still a static object, so you better switch back to normal with 7/1/3. With ±, you can zoom in or out. You can undo all changes to your objects by pressing Ctrl + Z.
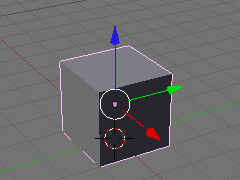
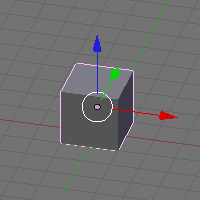
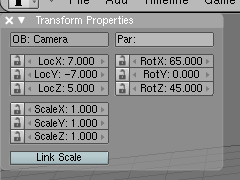
Translation, Rotation and Scaling of Objects
Edit Mode
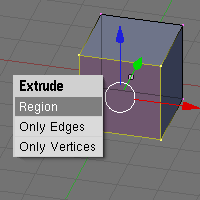
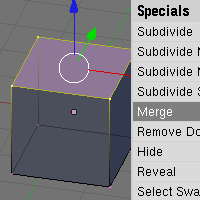
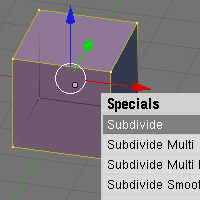
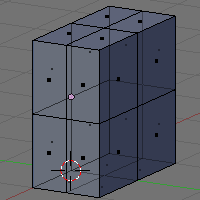
Extrusion Modeling
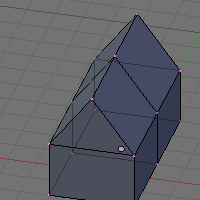
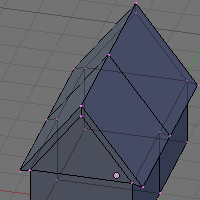
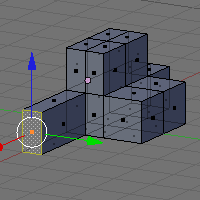
A First Model
Attachments (29)
- button1.png (6.3 KB) - added by FelixSchulthess 18 years ago.
- button2.png (10.0 KB) - added by FelixSchulthess 18 years ago.
- add.png (5.8 KB) - added by FelixSchulthess 18 years ago.
- cursor.png (4.9 KB) - added by FelixSchulthess 18 years ago.
- editmode.PNG (4.3 KB) - added by FelixSchulthess 18 years ago.
- extrude.PNG (5.5 KB) - added by FelixSchulthess 18 years ago.
- grab2.png (7.8 KB) - added by FelixSchulthess 18 years ago.
- grab.png (7.3 KB) - added by FelixSchulthess 18 years ago.
- hut1.PNG (5.2 KB) - added by FelixSchulthess 18 years ago.
- hut2.PNG (5.3 KB) - added by FelixSchulthess 18 years ago.
- hut3.PNG (5.6 KB) - added by FelixSchulthess 18 years ago.
- hut4.PNG (5.9 KB) - added by FelixSchulthess 18 years ago.
- merge.PNG (5.6 KB) - added by FelixSchulthess 18 years ago.
- rotate.png (7.2 KB) - added by FelixSchulthess 18 years ago.
- scale.png (7.2 KB) - added by FelixSchulthess 18 years ago.
- select2.PNG (5.4 KB) - added by FelixSchulthess 18 years ago.
- select3.PNG (5.8 KB) - added by FelixSchulthess 18 years ago.
- select.png (7.4 KB) - added by FelixSchulthess 18 years ago.
- split.png (6.4 KB) - added by FelixSchulthess 18 years ago.
- subdivide.PNG (5.2 KB) - added by FelixSchulthess 18 years ago.
- transform.PNG (6.6 KB) - added by FelixSchulthess 17 years ago.
- ship1.png (6.2 KB) - added by FelixSchulthess 17 years ago.
- ship2.png (8.2 KB) - added by FelixSchulthess 17 years ago.
- ship3.png (8.0 KB) - added by FelixSchulthess 17 years ago.
- ship4.png (10.1 KB) - added by FelixSchulthess 17 years ago.
- ship5.png (7.4 KB) - added by FelixSchulthess 17 years ago.
- ship6.png (11.7 KB) - added by FelixSchulthess 17 years ago.
- subsurf.png (7.9 KB) - added by FelixSchulthess 17 years ago.
- mirror.png (7.8 KB) - added by FelixSchulthess 17 years ago.
Download all attachments as: .zip